How to Download BCloud365 for iPhone & iPad (iOS)?
In today’s world, cloud platforms have become an essential tool for both individuals and businesses looking to store, manage, and access data securely. BCloud365, developed by JFTECH, is one such lightweight public cloud platform designed to provide efficient device and service management solutions. With a user-friendly interface, one-click device addition, and professional tools for managing video surveillance systems and industry-specific solutions, BCloud365 has made cloud management easier than ever.
For Apple users, BCloud365 is available on both iPhone and iPad, offering the flexibility to manage your cloud services anytime and anywhere. This step-by-step guide will walk you through how to download and use BCloud365 on iPhone and iPad, helping you make the most out of this powerful cloud platform on your Apple devices.
Why Use BCloud365 on iPhone & iPad?
BCloud365 offers a wide range of benefits, particularly for individuals and businesses who need quick and efficient cloud management solutions. Whether you need to monitor video surveillance cameras, store files, or manage other IoT devices, BCloud365 gives you the flexibility to manage everything remotely. But why should you consider using BCloud365 specifically on your iPhone or iPad?
1. Portability
The biggest advantage of using BCloud365 on mobile devices like iPhones and iPads is the portability. Whether you're at home, in the office, or on the go, you can access your cloud solutions, view surveillance footage, and manage your devices from anywhere.
2. Ease of Use
BCloud365 is designed with a user-friendly interface, which makes it easy to navigate, even for those with little technical experience. With the BCloud365 app, you can quickly add devices, monitor their status, and control them directly from your iPhone or iPad.
3. Real-Time Alerts and Notifications
By using BCloud365 on your iOS device, you can receive real-time notifications for important events, such as motion detection from security cameras or other critical device alerts. These notifications are key to ensuring you stay updated and can take action when needed.
4. Cloud-Based Management
With BCloud365's cloud-based platform, all your data is stored securely online. This means you don't need to worry about losing data due to device failures. Moreover, cloud management allows you to scale your services without worrying about local server setups.
5. Integration with Other Services
BCloud365 supports various industry-specific solutions, such as video surveillance, IoT device management, and more. You can integrate your existing devices with BCloud365 and manage them all from one unified platform.
System Requirements for BCloud365 on iPhone & iPad
Before you start downloading the BCloud365 app, it’s important to make sure your iPhone or iPad meets the necessary system requirements. Here’s a quick overview:
For iPhone
Operating System: iOS 11.0 or later
Device: iPhone 6s or newer
Storage: At least 100 MB of free storage for installation and data
Internet: Active internet connection for syncing and cloud functionality
For iPad
Operating System: iPadOS 11.0 or later
Device: iPad mini 4 or newer, iPad Air 2 or newer, or any newer iPad Pro
Storage: At least 100 MB of free storage
Internet: Active internet connection for cloud synchronization
If your device meets these requirements, you’re all set to proceed with downloading the app.
How to Download & Install BCloud365 for iPhone & iPad?
Downloading the BCloud365 app on your iPhone or iPad is a simple process, and it’s available directly from the Apple App Store. Here’s a step-by-step guide to help you get started:
Step 1: Open the App Store
On your iPhone or iPad, open the App Store by tapping the App Store icon from your home screen.
Step 2: Search for BCloud365
In the App Store, tap on the Search tab at the bottom.
In the search bar at the top, type BCloud365 and press Enter or tap the Search button.
Step 3: Select the App
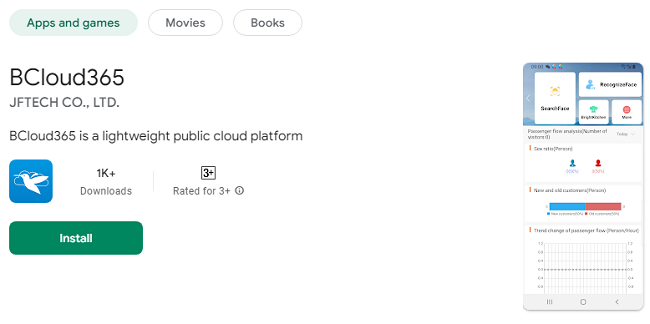
Look for the BCloud365 app in the search results. It should be listed with the official JFTECH logo and app description.
Tap on the app icon to view the app’s page.
Step 4: Download the App
On the app page, tap the Get button (or the cloud icon with a downward arrow if you've downloaded it before).
If prompted, enter your Apple ID password or authenticate with Face ID or Touch ID to confirm the download.
Once the app is installed, you’ll see the BCloud365 icon on your home screen, and you can open it directly from there.
Setting Up BCloud365 on iPhone & iPad
Now that you’ve downloaded BCloud365 on your iPhone or iPad, it’s time to set it up. Here’s how to get started with the app:
Step 1: Open the BCloud365 App
Tap on the BCloud365 app icon on your home screen to launch the app.
The first time you open the app, you will be prompted to either log in or sign up for a new account.
Step 2: Create a New Account or Log In
If you already have a BCloud365 account, simply enter your username and password and tap Login.
If you don’t have an account yet, tap Sign Up to create a new account. You will need to provide your email address, create a password, and complete any email verification if required.
Step 3: Set Permissions
The app may request permission to access certain features of your iPhone or iPad, such as the camera, location, or notifications. Allow these permissions to enable full functionality of the app.
For example, granting camera access will enable you to add devices by scanning QR codes, and allowing notifications will help you stay updated on important alerts.
Step 4: Sync Your Devices
Once you’re logged in, you can begin adding devices to your BCloud365 account.
Tap on Add Device or Scan QR Code to start the device registration process.
Follow the on-screen instructions to add devices such as video surveillance cameras, smart home gadgets, or other IoT devices.
How to Use BCloud365 on iPhone & iPad?
Once you’ve successfully set up BCloud365 on your iOS device, it’s time to explore its features and start using the app to manage your cloud-based services. Here are some key functions you can perform:
1. Monitor Devices in Real-Time
The BCloud365 app allows you to monitor your connected devices in real time.
If you’ve set up video surveillance cameras, you can stream live footage directly to your iPhone or iPad.
To view live feeds, tap on the device you want to monitor and select the Live Stream option.
2. Receive Alerts and Notifications
BCloud365 supports real-time notifications for important events, such as motion detection or device malfunctions.
You can customize your notification settings by going to Settings > Notifications within the app. You can enable alerts for events like camera movement, system status changes, or other critical events.
3. Control Devices Remotely
You can interact with your devices directly through the app. For example, if you’ve connected security cameras, you can change their viewing angle, zoom in, or adjust settings remotely.
To control a device, tap on the device icon in your dashboard and select the appropriate control options.
4. Access Cloud Storage
BCloud365 integrates cloud storage to securely store your video footage, files, and data.
You can access stored files by navigating to the Cloud Storage section in the app. From there, you can view, download, or delete files as needed.
5. Set Device Schedules
You can set schedules for when devices should be active or inactive, making automation simple and efficient. For instance, you can program surveillance cameras to record only during certain hours of the day.
Key Features of BCloud365 for iPhone & iPad
Here’s a quick rundown of the core features that make BCloud365 a powerful platform for managing your cloud-based services:
Device Management: Add, manage, and control all your devices through the app.
Real-Time Video Surveillance: Monitor cameras and streams in real time.
Cloud Storage: Securely store and manage files, videos, and data.
Notifications: Get real-time alerts for device activities.
Easy Setup: Simple device setup using QR code scanning or manual addition.
Cross-Platform Support: Sync devices across multiple platforms, including iOS, Android, and desktop.
Troubleshooting Common Issues with BCloud365 on iOS
While BCloud365 is generally easy to use, you may encounter some common issues while using it on your iPhone or iPad. Here are some troubleshooting tips:
1. App Crashes or Freezes
Try restarting the app or rebooting your iPhone/iPad to resolve any app crashes.
Make sure your iOS version is up to date by going to Settings > General > Software Update.
2. Device Not Connecting
Ensure that your iPhone or iPad is connected to a stable Wi-Fi or cellular network.
If using QR code scanning to add a device, ensure the code is clear and visible to the camera.
3. Notifications Not Working
Go to Settings > Notifications > BCloud365 and ensure that notifications are enabled.
Check your device’s internet connection to ensure that you’re receiving real-time alerts.
Benefits of Using BCloud365 on iOS
Using BCloud365 on your iPhone or iPad provides several advantages, including:
Portability: Access your cloud solutions anytime, anywhere.
Convenience: Manage all your devices from a single, user-friendly app.
Security: Keep your data and devices protected with real-time monitoring and notifications.
Efficiency: Save time by managing everything from your mobile device instead of relying on desktop software.
Remote Access: Control and monitor devices remotely, ensuring complete flexibility.
Conclusion
BCloud365 is a powerful and flexible cloud platform that allows users to manage devices, monitor video surveillance, and access industry-specific solutions right from their mobile devices. By following this guide, you can easily download, set up, and use BCloud365 on your iPhone or iPad. With its intuitive interface, real-time notifications, and cloud-based management, BCloud365 is a perfect solution for anyone looking to stay connected and manage their devices on the go.
Ready to take control of your cloud solutions? Download BCloud365 today from the App Store and start managing your devices effortlessly on your iPhone or iPad!