BCloud365 for PC - Download on Your Windows & Mac
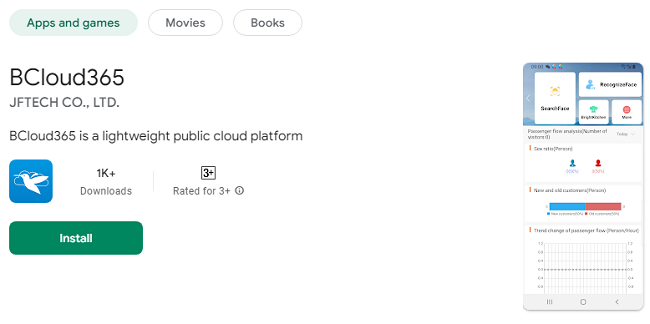
In the modern world, the need for robust and accessible cloud platforms is greater than ever, and BCloud365 has emerged as one of the most versatile solutions in the market. Developed by JFTECH, this lightweight public cloud platform allows users to easily manage devices, services, and solutions without complex setups or the need for local servers. Whether it’s for video surveillance, cloud storage, or other industry-specific needs, BCloud365 offers seamless management from anywhere.
While BCloud365 is widely used on mobile devices, many users also prefer to use it on their PCs for the larger screen, enhanced productivity, and more powerful system capabilities. If you’re looking to download and use BCloud365 on your Windows PC or Mac, this comprehensive guide will walk you through the entire process.
Why Use BCloud365 on PC?
BCloud365 is a powerful cloud platform that allows users to manage devices, monitor systems, and access cloud-based solutions. While it is predominantly used through mobile devices, there are several reasons why users might want to run BCloud365 on a PC:
Larger Screen Size: A PC offers a much larger display than a smartphone or tablet, which can be especially beneficial for users managing multiple devices or viewing real-time video surveillance footage.
Better Performance: PCs typically have better processing power, making the experience smoother, particularly when dealing with high-resolution video feeds or complex cloud applications.
Multitasking: With a PC, you can run multiple applications and manage your BCloud365 account alongside other work-related tools, making it easier to stay productive.
Convenience: Managing BCloud365 on a larger screen can be more efficient, especially for users who need to interact with multiple devices or access data from different industries.
Enhanced Security: Running BCloud365 on a PC may provide additional security features such as antivirus software, firewall protections, and better network management compared to mobile devices.
System Requirements for BCloud365 on Computer
Before you start downloading the BCloud365 app on your PC, it’s important to ensure your device meets the necessary system requirements for optimal performance.
For Windows PC
Operating System: Windows 7, 8, 8.1, or 10 (64-bit recommended)
Processor: Intel or AMD processor with 1 GHz or faster clock speed
RAM: 2 GB or more
Storage: At least 200 MB of available space
Graphics: Integrated graphics or any GPU that supports basic 3D rendering
Internet: Stable internet connection for cloud operations and device management
For Mac
Operating System: macOS 10.9 or later (Mavericks, Yosemite, El Capitan, or newer)
Processor: Intel processor with 1 GHz or faster clock speed
RAM: 2 GB or more
Storage: At least 200 MB of free disk space
Internet: Active internet connection for cloud functionality
If your device meets these requirements, you’re good to go! Now, let’s move on to the installation process.
How to Download BCloud365 for PC Windows?
To get BCloud365 running on your Windows PC, you’ll need to use an Android emulator because BCloud365’s official app is designed for Android and doesn’t offer a native Windows version. An emulator will allow you to run Android apps on your PC seamlessly.
Follow these steps to download and install BCloud365 on Windows:
Step 1: Download an Android Emulator
An Android emulator is a software program that mimics the functionality of an Android device on your PC, allowing you to download and use Android apps like BCloud365.
Popular Android emulators include:
BlueStacks: One of the most widely used and reliable Android emulators.
NoxPlayer: Another great choice with a simple interface and efficient performance.
LDPlayer: A lightweight emulator with high speed and compatibility.
To download BlueStacks, for example:
Go to the BlueStacks official website (www.bluestacks.com).
Click on the Download BlueStacks button to download the installer.
Open the downloaded file and follow the installation prompts.
Step 2: Install the Emulator
Once the emulator is downloaded, follow these steps to install it:
Double-click on the downloaded file to begin the installation.
Follow the on-screen instructions to complete the installation process.
Once installed, open the emulator.
Step 3: Install BCloud365 on Windows
Now that you have the emulator running, follow these steps to install BCloud365:
Inside the emulator, open the Google Play Store (you’ll need to log in with your Google account).
In the Play Store’s search bar, type BCloud365.
Find the app in the search results and click Install.
Wait for the installation to complete.
Once BCloud365 is installed, you can launch it directly from the emulator’s home screen or app drawer.
How to Download BCloud365 for Mac?
For Mac users, the process of downloading and installing BCloud365 is very similar to Windows, involving the use of an Android emulator. You can use BlueStacks or another compatible emulator to run BCloud365 on your Mac.
Step 1: Download an Android Emulator
Here’s how to download BlueStacks on Mac:
Visit the BlueStacks official website (www.bluestacks.com).
Click Download BlueStacks for Mac.
Once the file is downloaded, open the .dmg file to begin installation.
Step 2: Install the Emulator
After opening the .dmg file, drag the BlueStacks icon into your Applications folder.
Double-click on the BlueStacks icon in the Applications folder to start the installation process.
Follow the prompts to complete the setup.
Step 3: Install BCloud365 on Mac
Once BlueStacks is running, the process to install BCloud365 on Mac is identical to the Windows installation:
Open Google Play Store within BlueStacks.
Search for BCloud365 in the Play Store.
Click Install to download and install the app.
After the installation is complete, you can launch BCloud365 directly from the emulator’s home screen.
How to Set Up BCloud365 on Your PC?
Now that BCloud365 is installed on your Windows or Mac computer, it’s time to set it up. Here’s a quick guide to get you started:
Step 1: Log Into Your Account
Open BCloud365 through the emulator.
If you already have a BCloud365 account, click Login and enter your username and password.
If you don’t have an account, you’ll need to sign up by providing your email address, creating a password, and completing any necessary verification steps.
Step 2: Add Devices to Your Account
Once logged in, you can begin adding devices:
Look for the Add Device or Scan QR Code option on the dashboard.
Use the QR Code scanning feature to add devices (such as video surveillance cameras or other IoT devices) to your BCloud365 account.
Follow the on-screen instructions to complete the device addition.
Step 3: Manage and Monitor Devices
After adding devices, you can:
Monitor live feeds (for surveillance cameras).
Set alerts for device notifications.
Control devices remotely (where supported).
Benefits of Using BCloud365 on a PC
Running BCloud365 on your PC offers a range of benefits, especially for users who need more screen space, better performance, and the convenience of multitasking. Here are some of the key benefits:
Increased Productivity: A larger screen and enhanced processing power allow for a more efficient experience when managing multiple devices or viewing complex cloud applications.
Smooth Performance: PCs, with their superior hardware, run BCloud365 more smoothly, especially when managing high-definition video feeds or complex cloud-based solutions.
Multitasking: On a PC, you can manage BCloud365 alongside other work applications, making it easier to keep track of your tasks and stay productive.
Better Security: Running BCloud365 on your PC can provide additional security features like firewalls, antivirus programs, and other protective measures.
Conclusion
Downloading and using BCloud365 on your PC (whether Windows or Mac) can greatly enhance your experience with this cloud platform. While it’s primarily designed for mobile use, the flexibility of Android emulators allows you to use BCloud365 on any computer, whether you’re looking to manage video surveillance, cloud storage, or other industry-specific solutions.
By following the steps in this guide, you can easily install and set up BCloud365 on your Windows or Mac computer, taking full advantage of the larger screen and enhanced capabilities of your PC. With BCloud365, cloud management becomes more intuitive, efficient, and accessible, whether you’re on a mobile device or at your desk.
Ready to start managing your cloud solutions on a bigger screen? Download the emulator, install BCloud365, and start exploring its powerful features today!